


On a scale of one to a tarp, how versatile is your backpacking shelter?
A tarp shelter is a must-have if you’re a serious prepper or outdoorsman. Lightweight, waterproof, and easy to pack, tarps can be used in just about any scenario, from two-day trips to Joshua Tree National Park to thru-hikes across the Appalachian Trail.
But that’s not the best part about tarp shelter camping. Our favorite thing about tarps is that you can transform and customize them however you like.
In this article, we’ve listed 26 tarp shelter ideas for your next outdoor trip. These tarp shelter options range from the very basic to the more intermediate ones, so go crazy with this backcountry origami. We’ve also included tons of useful related tutorials and hacks in between.
Ready to practice? Here we go:
A Few Things to Consider When Picking Tarp Shelter Configurations
Before we dive into the tutorials, let’s look into some factors that you have to consider when choosing and setting up a tarp shelter:
Weather and geography
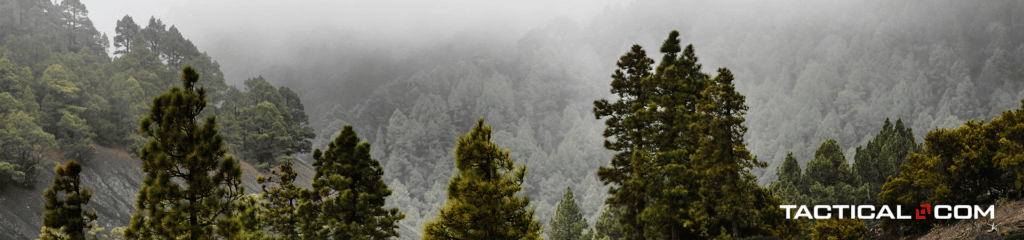
The weather or climate will play a big part in choosing your tarp setup. For example, if it’s raining heavily, you’d need a camping tarp that’s fully enclosed, preferably with a groundsheet to keep the mud out. If you’re in a dry and hot environment, however, ventilation would be your top priority, so you’d need an open tarp setup that maximizes airflow.
The geography of the area is vital, too, so you’ll have to be very strategic in choosing where to put up your tarp shelter. You can use a tarp configuration with a ridgeline if you’re in an area with lots of trees. If you’re somewhere flat, then you’re better off with a configuration that uses stakes and trekking poles instead.
Knot-tying skills

A tight tarp shelter requires sharp knot-tying skills. Need a refresher on how to do your knots? We’ve got just the thing here. We also have a tutorial on essential tarp shelter knots and how to use them in real-life scenarios further along, so keep reading!
Tarp dimensions and types

There are two general types of tarps: flat tarps and shaped tarps. Flat tarps have even edges, 90-degree corners, and can further be classified into square or rectangular types. 9×9-foot square tarps are the most common since they’re sufficient for one or two people and are extremely versatile. The tutorials featured in this article mostly use square tarps.
Shaped camping tarps, on the other hand, are lighter and easier to set-up, but have limited configurations owing to their unique shape.
The Best Tarp Shelter Configurations For Camping, Hiking, And Survival
Now that we’ve got those out of the way, here are 26 tarp configurations and setup techniques that you can use for both survival and the outdoors:
Basic knots and tarp setups
If you’re new to bushcrafting or lightweight backpacking, you’ll need a refresher on how to tie knots and secure ridgelines. In this comprehensive video, Mike from MCQ Bushcraft shares his expert knowledge on knot-tying and how to secure your tarp shelter with ease.
This tutorial will teach you basics like:
- the difference between bights and loops
- how to tie an overhand knot
- creating a clove hitch for ridgelines
- making the reef or square knot for extending lengths of paracord
- securing half-hitch knots for when you’re tying areas off
- using toggles to make stronger knots and ridgelines
- using quick-release knots
- tying prusik knots
As a bonus, the video also shows how to apply all these knots and more. If you want to learn the ropes on tarp camping, this tutorial is great for starters.
5 Basic Tarp Setups
And now for the basics. This must-watch tutorial features the following configurations:
- the stealth tarp for when you want to lie-low and be inconspicuous
- the tipi tarp for larger headroom
- the basic A-frame tarp for various outdoor and survival scenarios
- the plow point configuration for when you need to have a quick but reliable shelter and…
- the tarp tent when you want something stable but can’t set up a ridgeline
This tutorial is pretty comprehensive and covers the pros and cons of each configuration.
A Closer Look At The A-Frame Tarp Shelter

The A-frame tarp shelter is one of the easiest configurations you can make. It’s quick to set up and can easily be taken down when you need to break camp. The A-frame is similar to the basic lean-to but it’s better because, while the A-frame doesn’t have a groundsheet, it would at least get you two walls and a roof.
For this shelter to work, you’ll only need your tarp, some sturdy cordage like 550 paracord and some trees to tie a ridgeline to. Add a couple of bowline and fisherman’s knots and you’ll have an A-frame shelter.
If you want to modify your A-Frame to make it sturdier, you can do so by using two tarps of different sizes. Here’s a tutorial for that.
5 Intermediate Tarp Shelters For Backpacking and Survival

If the last roundup was all about the basics, this video will take your skills a notch higher. This tutorial from UglyTent Bushcraft and Survival features 5 unique tarp tent configurations that you can use for backpacking or bugging out. In this video, you’ll learn how to put up the following:
Square arch tarp configuration
This setup is compatible with most rectangular mosquito nets, which makes it perfect for summer camping. To create a square arch, simply drape a tarp over a double ridgeline. If you think the ridgeline is too narrow, you can always put a stick across the two ridgelines to widen the gap. A word of warning, however: since it’s got a flat roof, the square arch isn’t the best for rainy or snowy seasons.
Whelen lean-to tarp shelter
This is a variation of the lean-to. Instead of ridgelines, you prop it up with a pair of trekking poles.
Adirondack
A tarp configuration similar to a lean-to but is more spacious since it has a long center pole to create more headroom. This setup works great in any type of weather. It’s very spacious and well-ventilated but also has good runoff. You can even cook under it if you like. The downside is that it doesn’t have a groundsheet.
Forester
This uses a teepee for the main frame of the tarp. This has a groundsheet and can be fully enclosed to protect you from inclement weather.
Star tarp configuration
This setup is a no-brainer. All you have to do is secure the corners of the tarp and hold it up with a couple of trekking poles.
Ultra Lightweight Tarp Setups Without Ridgelines

Planning to ride the ultralight backpacking tarp bandwagon? Here’s the tutorial video for you. This short and sweet video from REI features four easy ways to set up an ultralight tarp when out in the backcountry.
This video features the following configurations:
- A-frame tarp shelter – this version of the A-frame uses trekking poles instead of a ridgeline
- Close-end A-frame – offers more protection against the wind and nasty weather
- Wind-shed – this shelter is great for protection in dry, windy environments. It completely shields you from the wind on one side and is open on the other, so you get to enjoy lots of space, ventilation, and of course, the view.
- C-fly – like the A-frame, this version of the C-fly uses trekking poles and some guy lines staked to the ground. While this provides plenty of space and protection, it also requires a lot of stakes.
If you’re not really keen on using your trekking poles to hold your shelter up, the video also has a bonus tutorial on how to construct these shelters with ridgelines and trees.
Tarp and Bivy Setup

Using your tarp with a bivy is a common and easy way to set up camp, especially if you’re trying to shed weight from your bag. In this tutorial, the tarp is basically used as a rain fly to protect the bivy. If you want to learn how to make an actual bivy configuration from your tarp, check out this tutorial.
C-Fly, Envelope Tarp Setups And Their Modified Versions

Floored tarp configurations like the C-fly and envelope are a favorite among lightweight and minimalist backpackers since they’re comfortable but uncomplicated. These setups are also very modifiable; you can tweak them to make sturdier pitches by simply adjusting a peg or two. This tutorial shows you how to make the basic frames and their corresponding mods.
Tarp Setup For Hammocks

Tarps plus hammocks make for an extra lightweight and versatile combination. This setup lets you enjoy the outdoors without pitching a bulky tent or spending the night on damp ground. It’s ideal for when you’re camping in the summer, especially when you want to explore areas that have lots of trees.
So, which do you set up first, the hammock or the tarp? Mike from MCQ Bushcraft advises to start off with the bigger of the two items: the tarp. This way, you’ll have an easier time laying out everything underneath it, which will include your hammock and the rest of your camp items.
To make this setup work, it’s important for you to select the right place. Choose trees that are a good distance from each other, so your tarp can hang taut. Beware of old, rotten trees that might fall over; never tie your ridgelines there. You can do a simple A-frame configuration or modify it to a diamond tarp shelter to maximize the space. Once your tarp is up, simply hang your hammock and enjoy the outdoors.
How About A Hammock Inside The Tarp?

Is it possible to have a hammock inside a tarp tent? This tutorial shows you just how to do it. The hammock actually goes inside the tarp and although it’s not fully suspended in the air, it still functions as a really neat sleeping bag complete with a nifty mosquito net to keep the bugs out when you’re sleeping.
How To Tie Strong Guy Lines

Your tarp shelter is only as secure as your guy lines, which are essential in staking your tent down. They keep your lines taut and prevent your shelter from sagging or collapsing.
This tutorial discusses try-and-tested methods on how to secure your guy lines using different knots, hitches, and pegs. These also allow you to quickly set up and take down your tarp shelters.
How To Set Up A Tarp Without The Cordage

Out of cordage? Don’t worry, you can still set up a tarp with the help of some tree limbs. It would take some hacking, sawing and a few adjustments to make sure that the branches you’re using won’t puncture your tarp. It’s not the most versatile shelter out there, but it does its job just fine.
Quick Tarp Set Up Trick

Here’s a quick hack to help you secure your lines without using knots. When you don’t feel like doing knots to secure your grommets, you can always use a stick to do the job. It’s not an end-all be-all trick, but it does come in handy, especially when you need to make shelter quick.
How To Fold A Tarp In Seconds

Folding a tarp shelter can be a headache…if you don’t know how to do it the right way. This short and sweet video teaches you how to fold a square tarp in seconds and keep it nice and organized in your pack.
The secret to this “magic trick” is actually super simple. Here’s a step-by-step instruction if you find the video too fast:
- Lay your tarp completely flat on the ground and stay at the centermost point.
- From the center, grab the left and right points of the tarp.
- As you’re putting the left and right points of the tarp together on one hand, hold the center point of the tarp with your other hand as well. Pull all three points towards you simultaneously.
Once you stretch out the folds and creases, you’ve got yourself a neatly folded tarp.
How To Set Up A Tarp Shelter For Winter Camping

Think you can’t go winter camping with a tarp shelter? Think again. With the right configuration, clothing, sleeping bag, accessories, and a big roaring fire, you can stay warm in a tarp shelter even when camping during the colder months. This video is more of a solo backpacking trip documentation rather than a straight-up tutorial, but you can still take a lot of pointers from this backcountry adventure, like how to put together an effective firelay, construct a bushcraft chair, cook a hot meal, and of course, sleep comfortably during the winter.
Enclosed Tarp Setups For Bad Weather

Last but definitely not least, we’ve got a tutorial that features a handful of enclosed tarp configurations that you can use in bad weather. These setups are a bit more complicated than others, but they’re very stable and can hold up against strong winds and rain.
Tarp Shelter Quick Facts
- Tarp shelters are temporary shelters. They’re typically used in emergencies.
- You can set up different tarp shelter configurations, depending on your needs.
- You can buy tarp shelters or make them from scratch.
- Tarp shelters can be set up on the ground, secured to trees, or attached on top of vehicles.
- While tarp shelters are waterproof and offer a good deal of protection from the elements, they’re not meant for extreme weather.
Final Thoughts
Whether you’re camping for fun or are bugging out for survival, having a tarp gives you more flexibility and allows you to carry a more lightweight pack. They can be made from sturdy material that can protect you from the environment, rain or shine. What sets them apart from tents is that they can be customized and configured to fit your needs.
On the flip side, tarp shelters might take a bit of getting used to. Compared to tents, tarp configurations take a bit of skill and practice, but once you get the hang of making these shelters, you’ll have gained a very useful skill that can see you through many camping trips and even survival situations.
Try “forgetting” your tent the next time you go camping and see if you can survive a couple of nights with just your trusty tarp. Let us know how it goes in the comments below!
