


Every prepper out there wants to have a well-stocked pantry for when SHTF, but a lot of them don’t know where to start. Instead of answers, questions like…
What kind of food should I store?
How long should I prepare for?
How much will a prepper pantry cost?
Where the heck do I even put all this stuff?
…keep sprouting left and right.
Ever had a headache trying to calculate how many cans of beans you should buy on your next grocery run, or getting a working FIFO method in place? We feel you, buddy.
Starting a prepper pantry from scratch is no easy task, but it’s not impossible either. As long as you have the right information, plan, and attitude, you can build an efficient one in no time.
Here’s everything you need to know about building a prepper pantry:
Part 1: What Kind of Food Should You Store in a Prepper Pantry?

It’s important to remember that your prepper pantry is separate from your regular, everyday pantry.
The supplies you store here are specially set aside for emergencies and, as much as possible, not consumed for daily use. You can start off by setting aside supplies good for 3 days and slowly build it up to a 2-week pantry, a 1-month pantry, a 6-month pantry, and so on.
That being said, what kind of food should you store in your pantry?
Here are some simple criteria.
Your prepper pantry should be stocked with:
Familiar food that you actually like to eat

Surprise! Your prepper pantry might be a separate food stash from your regular pantry, but it doesn’t mean you have to fill it with hardtack and nasty Meals Ready to Eat (MREs). On the contrary, you might want to fill it with food that you actually like to eat.
Remember: your pantry might be the only available food source when SHTF. If you have to eat a certain kind of food for an extended period of time, that food better be something that you like to eat regularly.
Keeping familiar food on the shelf not only maintains a semblance of normalcy, but it also makes food preparation a whole lot easier. This is especially important if you have kids who are picky eaters or family members who have dietary restrictions. Storing familiar food in your prepper pantry lessens the chances of food allergies and reactions as well.
Shelf stable
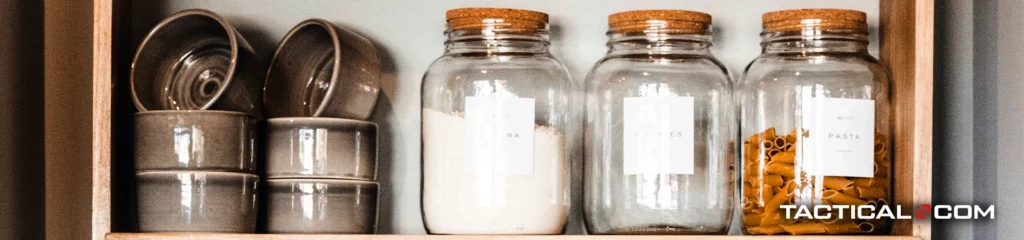
Spoilage is a major issue in keeping a prepper pantry, so select food products that will last a long time, even without refrigeration. These include dry non perishable food like white rice, flour, canned beans, canned soups, pasta, powdered eggs, dehydrated fruits and vegetables, and jerky, to name a few. You can find a longer list of survival pantry food here.
Foods with long shelf life give you more bang for your buck because they are easier to keep and don’t need to be rotated as often as perishable goods. Store them properly and check on them regularly to ensure their quality.
High in energy and nutritional value
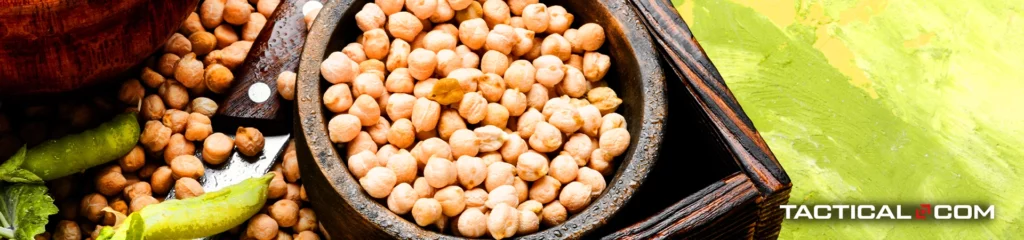
In a survival situation, you’d need all the strength you can get. In the possible absence of electricity and other modern conveniences, you gotta expect to do a lot of manual labor, so make sure to store foods that have high-calorie yields and excellent nutritional value.
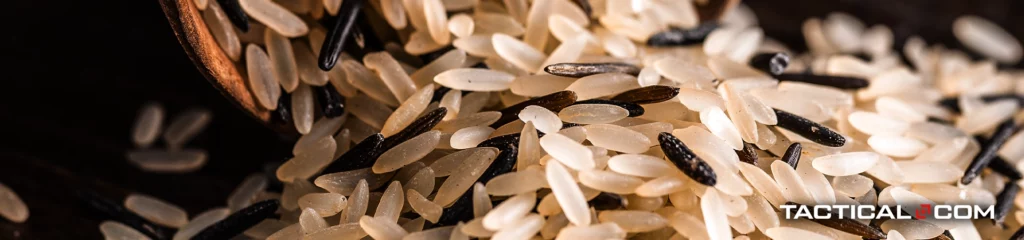
Examples of high-energy food include nuts and beans, and grains like rice, corn, and quinoa. It also doesn’t hurt to stock up on food supplements and vitamins and minerals.
Food you can buy in bulk
Purchasing food in bulk can save you and your family some serious cash in the long run. You can get rice in 50-kg sacks, or a month’s supply of powdered eggs, for example. Buying canned goods during grocery sales is also one way to slowly but surely build that prepper pantry while saving some cash on the side.
Food that’s easy to prepare
When SHTF, you might not have resources like electricity or fuel. This means that you have to stock food that would require little time and energy to prepare. More importantly, stash food products you know how to cook in the first place.
For example, if you don’t know how to bake bread from scratch, it might be best if you don’t store sacks of wheat in your pantry.
Keep in mind that you don’t have to buy all these foods in one go. You can slowly build your pantry by buying an extra can of tuna or a pack of pasta during your grocery run. If you can spare some cash, buy a sack of rice or flour and repack them into containers better suited for long-term storage.
You can also plan your prepper pantry supply around your family’s daily calorie intake. While most people need 2,000-2,500 kcal/day, daily energy requirements can differ for every individual, depending on their height, weight, and daily activity.
You can use a tool like this to calculate daily calorie intake and then buy items that best provide these calories for you and your family.
Preserving Your Own Food

Aside from buying ready-made food from groceries and supermarkets, consider preserving your own food. Food preservation can help you save a lot of money, decrease food wastage and ensure that you’ll be eating real, even nutritious, food when SHTF.
Food preservation is a useful skill, especially if you have excess supplies or produce from your survival garden.
Here are some food preservation techniques that you can do at home:
Canning
Before the dawn of electricity and refrigeration, people used to can food all the time. They stored their dried produce, jams, preserves, fermented vegetables, and even meat in cans. When done right, canned food can last for several months.
Dehydration
Back in the old days, folks preserved meats by hanging them out in the open and literally leaving them out to dry. These days, you can dehydrate a variety of food products like beef, pork, venison, and even fruits and veggies with the help of a dehydrator. Dehydrators are a great prepper investment since they can extend the shelf life of your food from a couple of days to several months.
Curing
This is another food preservation technique often associated with meat products like ham, bacon, and sausage. Curing mainly uses salt, nitrates, and nitrites to draw water out of meat to extend their shelf life.
Fermentation
Pickles and sauerkraut are produced through fermentation. Know more about this food preservation method through this article.
How About Freeze Dried Food?

Freeze dried food may not be the cheapest items to store in your prepper pantry, but it does have its advantages.
For one, it can last decades! Freeze dried food retain most of its nutritional content as well as taste, so you don’t have to worry about eating food that tastes like cardboard. It’s also very easy to prepare. All you need is hot water to reconstitute these meals, and they’ll be ready to eat.
Freeze dried meals like beef stroganoff or lasagna are now available in the market, so if you have a few bucks to spare, you might want to buy a couple for your prepper pantry.
Part 2: Selecting the Right Place

Location is crucial in building your prepper pantry. It has to have the right conditions to fight spoilage, avoid vermin, and keep your stash organized.
High temperatures and moisture content hasten spoilage by encouraging the growth of bacteria and fungi, so make sure your location is consistently cool and dry, away from direct heat and humidity. Direct exposure to light can cause a chemical reaction called photodegradation.
Photodegradation zaps out the pigments, vitamin and nutrient contents of the food, and their packaging. Protect your stash from direct sunlight by putting on thick drapes or blinds on your windows.
It’s also important to remember that you choose an area that isn’t prone to frequent changes in temperature. Dips and spikes in temperature can do as much damage as direct heat and light, which is why the garage isn’t an ideal candidate for a prepper pantry.
Many preppers select the coldest room in the house, like the basement or attic, as their prepper pantry so that even in the event of a blackout, their supplies can remain relatively cool.
It’s also an advantage if your pantry space can accommodate shelves to make organization a whole lot easier and more efficient. Here’s a quick and easy tutorial on how to create a great shelving system for your prepper pantry:

Building a Prepper Pantry With Limited Space
What if you don’t have a basement, attic, or spare room? How would you store all this food when you don’t even have space?
Having limited space is a common roadblock for many preppers, but a little bit of creativity and resourcefulness can go a long way.
For one, any unused space in your house can be converted into a food storage area.
You can go DIY and rig a small room with shelves to neatly store your supplies, just like this. Utilize spaces like the cupboard under the stairs, an old closet, or even a crawl space if you have one. Add some pull-out shelves and vertical storage systems to existing furniture. The area beneath your bed can be rigged with sliding shelves to store cans, as shown in this video.
Part 3: What Kind of Storage Supplies Do You Need?

Now that you know what kind of food you want to store in your prepper pantry and where to stash it, you have to find out which storage supplies best fit your needs.
Aside from the usual cans, totes, and mason jars, you’d need these storage supplies and accessories to help preserve your food and extend their shelf life:
Mylar bags
Mylar bags are one of the go-to items for long-term food storage. If you don’t have at least some of your food stored in mylar bags, you’re missing out big time.
These metalized baggies are made from the same material as space blankets, making them light and flexible but sturdy at the same time. Their high tensile strength prevents them from breaking or ripping easily. They’re also great at protecting your food from light damage and oxidation.
Mylar bags come in various sizes and thicknesses. The most popular ones are the 1-gallon bags (which usually come with a resealable mechanism) and the bigger, 5-gallon bags that you can use to line food buckets.
As for the thickness, you can’t go wrong with 4.3 mils and higher. Take note, though, that thicker mylar bags tend to cost more, so figure out what you want to store first before going on a mylar bag shopping spree.
Mylar bags can also be used to repack:
- Dry goods like grains and beans
- Baking goods like flour, sugar, and baking soda
- Medications, especially light-sensitive ones like antibiotics and vitamins
How to seal mylar bags

As mentioned earlier, some mylar bags don’t come with zips, so you’ll have to seal them using a heat sealer. Or, if you’re a little pinched for cash, a hair straightening iron or perhaps the usual clothes iron.
Here are some guidelines on how to seal your mylar bags:
- Don’t overstuff your mylar bag; allow a couple of inches for sealing.
- Test the heat of your seal first. If it’s not hot enough, it won’t seal properly. Keep it on too hot, and you’ll burn through your mylar bags.
- Make sure that the edges you’re sealing lie flat and that there are no debris or small particles smooth to avoid any breaks.
- Before sealing in your mylar bags, don’t forget to toss in an oxygen absorber to help fight spoilage.
Food buckets
5-gallon buckets are another great way to store your food. They’re excellent in protecting food supplies from heat, moisture, and vermin by keeping your food sealed in an airtight environment.
Most of the time, these buckets come with lids that can be secured in place by using a small rubber mallet. The lids can be pretty hard to remove once they’re on, so make sure to have a lid remover in your arsenal.
Other times, especially if the buckets are second-hand, they come with damaged lids or no covers at all. You can purchase regular lids separately or upgrade to gamma lids.
Unlike the regular variety, gamma lids twist on and off and can fit in most buckets, so you don’t have to worry about hammering them in place. They might cost a bit, but they do secure your food better.
As mentioned earlier, you can use 5-gallon mylar bags to line the inside of your food buckets. You can store food items like grain, cereals, flour, and sugar, as well as liquids like vegetable oil in these containers. Another option is to store multiple mylar pouches in one bucket. Just make sure that the buckets you’re using are made from food-grade plastic to avoid any harmful chemicals leaching into your food.
The best thing about these buckets is that you can get them cheap, sometimes even for free. If you’re reusing a food bucket, see to it that it didn’t hold any non-food substances previously. You don’t want to use a bucket that once contained nasty chemicals.
When storing these buckets, don’t stack them up too high to prevent breaking the lids.
Don’t forget to label them accordingly as well!
Oxygen absorbers
Oxygen absorbers are a neat addition to your food storage arsenal. These packets might be small, but they help a great deal in extending your food’s shelf life.
Oxygen creates an environment for bacteria and fungi to thrive. This element also deteriorates vitamins, flavors, and other food components—that’s why apples and potatoes darken when exposed to open air. Oxygen absorbers stop this from happening. These packets contain iron powder, which sucks the oxygen out of the air. And when there’s less oxygen in the air, there are lesser chances of spoilage.
O2 absorbers are safe to be placed with food, so put an oxygen absorber or two on top of your dry goods before sealing them in to extend their shelf life.
Part 4: How to Organize Your Prepper Pantry

You made it this far…congratulations!
You now have the right kind of food, the ideal place, and the right supplies. Now it’s time to get organizing.
Efficiency is the backbone of every working prepper pantry. It doesn’t matter how many supplies you have. If they’re all dumped in one big pile and you can’t find what you need, then all that effort was for nothing.
Here are some tips on how to whip your prepper pantry into shape:
FIFO Method
The First In, First Out method is the rule of thumb when storing food for mid- to long-term. The idea is simple, and you probably know how it works: the oldest items in your pantry get consumed first.
Whenever you buy new items to replenish your pantry, store them at the back of your shelves so that they get consumed in the order they were bought.
Don’t forget to take note of their expiration dates and write them out in Sharpie where you can easily see it.
Using Can Dispensers

This is an efficient way to implement a FIFO method in your prepper pantry. As shown in the video above, these dispensers allow your cans to simply roll down when they’re ready to use, instead of you pulling them out and then putting them back in everytime you need something.
If you’re a little tight on space, you can use this idea to utilize some of your cabinet spaces at home.
Disaster-Proofing Your Shelves
If you live in an area prone to earthquakes or hurricanes, it would be wise to keep your prepper pantry’s shelves bolted to the wall so they don’t fall off together with your supplies. It’s best to have a nice bar in front of those shelves as an extra precaution to keep your jars and glasses from falling on the floor.
Have a Working System
People’s brains work differently, so one organizational system may work like a dream for some and end up as a nightmare for others. Some people organize their stuff by category, some alphabetically, while others color-code their prepper pantry supplies.
Whatever your preferred system may be, it’s important to keep the following things in mind:
- Label everything. This is especially important if you’re repacking items into mylar bags or food buckets. Put the product’s name and manufacture and expiry dates right where you can see them. You can use a permanent marker or print out labels on sticker paper.
- Place the most used items where you can easily access them. That way, you don’t have to dig through your entire prepper pantry.
- Keep the heavier items at the very bottom of your shelves. This makes them easier to transport and lessens their chances of injuring somebody if they fall.
- Classify your supplies and store them by category. One shelf can be designated for breakfast items, another could be for baking, etc. Use square plastic totes or cardboard boxes to hold items on the shelves to maximize space and lessen clutter.
Another great idea is to put ingredients together all in one food-grade bucket. This allows you to ration stuff out depending on the meal you’ll be having that day. Add in the recipe (write it out on an index card) for good measure so anyone in your family can cook if you’re unable to.
Keep an Inventory of Your Supplies
Aside from employing an efficient way to store and use your supplies, you also have to keep a nice, organized list of all the things you have in your prepper pantry. This helps you keep track of things in one glance and makes food rotation easier.
Keep an Excel file or Google sheet of what you bought that month. Take note of which items are expiring, how much you’ve consumed or plan to consume in case of an emergency, and how many you need to buy for your next grocery trip. It’s an easy and systematic way to keep your prepper pantry in shape.
Final Thoughts
See, that wasn’t so bad, was it?
Building a prepper pantry only sounds like a tough and expensive job at the beginning, but it can actually be a breeze as long as you’ve got the right tools and information.
The key is to start building your prepper pantry now. It doesn’t matter if you begin slow, as long as you keep at it. Remember, the food supply chain will be one of the first ones to go when SHTF. You don’t want to be one of those guys fighting for a can of beans at the supermarket—you want to be the prepper who’s got everything at home.
We hope we answered all your burning questions about a prepper pantry. If you have more, don’t hesitate to drop a comment below!
