


Fences? Upgraded.
Sharp bushes? Planted.
Doors and windows? Never stronger.
Your security alarm? Ready to make some noise.
You’ve done everything you could to turn your home into a fortress. But what happens when the intruders still find a way inside and self-defense isn’t an option?
The answer’s to retreat to your safe room.
Here’s what you need to know about safe rooms and how to build a DIY safe room:
What Is a Safe Room?

You can fend off one bad guy easily. You can still put up a fight even if he calls his buddy for backup. But what if it’s a whole group of perps? Since you’re not the reincarnation of Bruce Lee, you’re pretty much screwed.
Unless you’ve got a safe room. Having one doesn’t mean you’re a wimp who can’t fight back. If anything, it’s proof that you’re smart enough to know when to retreat.
You also have to think about the other people in your household, like your kids and your poor grandma.
So, if you’re asking “why build a safe room?” That’s why.
But what is a safe room, exactly? Basically, it’s a room in your house where you and your family can escape to during emergencies like hurricanes, terrorist attacks, and home invasions. It has to be properly fortified and closed off to threats.
Unlike a bunker, it’s not meant for long-term shelter. You’re only supposed to stay in a safe room until the threat’s over or until help reaches you.
Keep reading to learn how to make a safe room:
How to Build a DIY Safe Room

You can have a safe room no matter where you live, whether that’s in a huge mansion, a tiny apartment, or something in between. There are different ways to build a safe room. You can either hire a contractor or go the DIY route to save money (and to make sure no one outside your circle knows about it).
If you decide to make a DIY safe room, here are some tips to help you get started:
Find the Perfect Location
Building a new home? You’re lucky, because that means you get to make your DIY safe room part of the building plan.
But if you’re like most folks who’ve already built a home and have no plans to start again from scratch, you’ll need to adjust to your current living space to make way for your retreat area.
When choosing your DIY safe room’s location, consider these things:
- Is it quick and easy for your family to get to?
- Is it closed off?
- Do you live in a hurricane or tornado-prone area?
- How ventilated is it?
- Can all your family members (and pets) fit inside?
- Does it have access to water and a bathroom?
A master bedroom with a bathroom, a big walk-in closet, or your family room in the basement could fit into these criteria.
If you’re strapped for space, then you’ll need to be creative and make do with what you have. The space you’ll designate as your DIY safe room doesn’t just have to be a safe room. You could also use it for other things, whether for storage or as a guest bedroom.
Strengthen the Door
Building a DIY safe room doesn’t have to be expensive, but if there’s one thing to invest in on this project, it’s your door.
These days, most interior doors are flimsy and can easily be kicked down by an average 10-year-old. They could also be pried open with a crowbar or other tools. Not exactly something you want in safe room doors.
Here’s what you can do to make the entrance to your hiding place as impenetrable as possible:
- Install an exterior steel slab door at the entrance.
- Add a solid door frame.
- Put a deadbolt lock.
- Buy a door jammer.
To make it less obvious to the bad guys, you could paint it to look like the rest of the doors in your home.
Windows or No Windows?

Any prepper would tell you that windows are a major security threat. Since even the slightest blow could break the glass, it’s best if your DIY safe room doesn’t have any.
But that’s gonna be close to impossible if you live in a small apartment or choose to use a bedroom as your place of retreat.
There are some ways to fix the window situation, though. You can either invest in a bulletproof security window (which is pricey but so darn worth it), or go for cheaper alternatives like window security film or double-paned glass.
Whatever you decide to go with, throw in some heavy curtains or blinds for good measure. Keep ’em completely closed and make sure no gaps are visible.
Seeing the enemy watch your every move is bad enough. What’s even worse is that they may work out a way to enter the safe room.
Put Up Walls
Building a DIY safe room in the basement is a smart decision since it’s already more secure than most rooms. It’s got walls that are tough as nails. Plus, it’s surrounded by earth and rock. This combination will make your room impervious to nearly everything—even bullets.
Don’t have a basement or live in a flood-prone place? You still have other options. FEMA actually has some plans for a safe room that’s meant for natural disasters, which you can also modify for home security purposes. The Department of Homeland Security has shared a couple of safe room designs that you can cop, too.
Here’s how to reinforce the walls in your DIY safe room:
Poured Concrete
Since this material’s super heavy, you should use this in a basement or on the ground floor. It’s pretty formidable against most threats and it’s not so expensive, either.
Sand
A sand-packed wall can offer quite the protection. Like poured concrete, it’s heavier than other materials but it’s also affordable.
Make sure you’re using a durable shovel to transport it. With its carbon steel blade and aircraft-grade aluminum handle, this particular shovel from TAC9ER can do the heavy lifting for you.
Armored Steel Panels
Adding these bad boys to walls can transform an ordinary room into a worthy hideout. Just don’t use them on upper floors; otherwise, you risk damaging your structure.
These panels are more expensive than the other options we’ve listed down, though. Depending on the room’s layout, you may not need to add them to every wall.
Other Options
The options we mentioned previously won’t be very useful if you’re renting. These materials may not also be accessible to you.
In this case, we suggest choosing the sturdiest place in your residence and then hardening its weak points. Here are some ideas:
- Flank your walls with bookshelves or other hulking furniture.
- Have something heavy that you can hide behind.
- Fill metal filing cabinets, push ’em toward your walls, and duck!
Hide It Under Their Noses?

You don’t need to live in an old castle to have a secret room. Camouflaging your place of retreat is actually easier—and cheaper—than you think.
You could create a bookcase door like the dude in the video above. Or, you could place a trap door on the floor that’s covered by a throw rug. Another option would be installing a door at the back of a closet.
But, while your secret entry would be pretty difficult to spot, don’t depend on it alone. You still need to follow the fortifications above in case the bad guys figure out where you’re hiding.
Communication
Your DIY safe room isn’t the place where you wait to die. Heck no.
But if there’s no help on the way, who knows how long you’ll be stuck in there?
You’ll need a way to get in touch with anyone—a friend, a relative, or a neighbor—who could find a way to help you. It’s smart to add these communication devices to your retreat place:
Cellphone
Keep a backup cellphone and an extra charger in your safe room. The awesome thing about phones these days is that they do more than call. You can text, access the internet, and use social media to communicate.
Landline
Landlines are old-fashioned, but they’re useful in emergency situations where your cellphone stops working. Install one in the secret room, but make sure it doesn’t need electricity.
Laptop, Tablet, or Computer

Besides your phone, you’ll need another way to access the web. Add a spare laptop, tablet, or computer to your room. There’s no such thing as too much backup, as we like to say. You can even use these devices for entertainment while waiting for the threat to pass.
Ham Radio
When the phone lines are down, you could use a ham radio to connect with fellow preppers. Just keep in mind that you need a license to operate it.
Two-Way Radio
Before the internet was a thing, walkie-talkies were probably your childhood gang’s favorite method of communication.
Well, guess what? Though old-school, they’re still pretty handy—especially during emergencies. If you’ve got a buddy who lives nearby, you could use a walkie-talkie or two-way radio system to request their help.
Cameras
You obviously can’t request help with cameras, but you can use them to spy on what’s happening outside. Installing a camera beside the door to your DIY safe room can alert you to intruders—or folks who are there to help.
Don’t Forget Your Supplies!

Before you place that order for a year’s worth of rice and canned tuna, remember that you’re not building a bunker. You’ll just need to set aside enough essentials to last at least 3 days (or around a week, in case you have to stay a little longer than expected).
Water
You know the drill: store one gallon of water per person per day. Yes, even if a bathroom’s attached to your safe room. Remember that running water isn’t always a guarantee, especially when SHTF.
Food
You’ll need to stash away non-perishable, shelf-stable, or ready-to-eat food. Peanut butter, jerky, energy bars, and crackers are some examples.
First Aid Kit
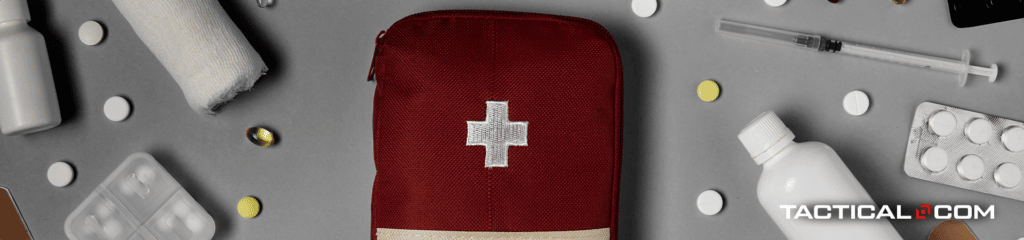
Your DIY safe room needs a fully stocked first aid kit in case someone got hurt while fleeing. Concentrate primarily on supplies that help with traumatic injuries. Pain relievers, antacids, and anti-diarrhea meds would also be a good idea.
And if a family member has a medical condition, stock up on their regular meds, too.
Hygiene and Sanitation
In a perfect world, your safe room would include a bathroom. But if that’s not your reality, you’ll need another way to do your business. A camping toilet is one option.
Besides that, prepare hygiene supplies like baby wipes, alcohol, diapers, and feminine hygiene products (if necessary).
Cold Weather Gear
When the heat stops working, how can you avoid freezing to death inside your safe room? The answer’s to store winter hats, coats, gloves (go for a pair with Kevlar lining for optimal protection), extra clothing, and sleeping bags.
Entertainment
Staying cooped up in that DIY safe room for hours with nothing to keep you entertained is a recipe for disaster. To prevent your family members from being at each other’s throats, store some board games, cards, books, and other things they enjoy in a box.
Flashlight
You’re gonna need a way to see in the dark when the power’s gone, and candles are a big nope. A tactical flashlight can easily light up your safe room.
Your job’s not over after you’ve secured all your supplies. You still need to check ‘em regularly for expired food, meds, and batteries.
Final Thoughts
It’ll take time, resources, and a lot of patience to build a safe room. But the payoff’s worth it when something or someone threatens your family’s safety.
Even if you never end up using it for an emergency (which is the ultimate wish), it’s still something that’s pretty awesome to have in your home.
Have you ever made a safe room? What was the most challenging part of the process? Tell us in the comments!
